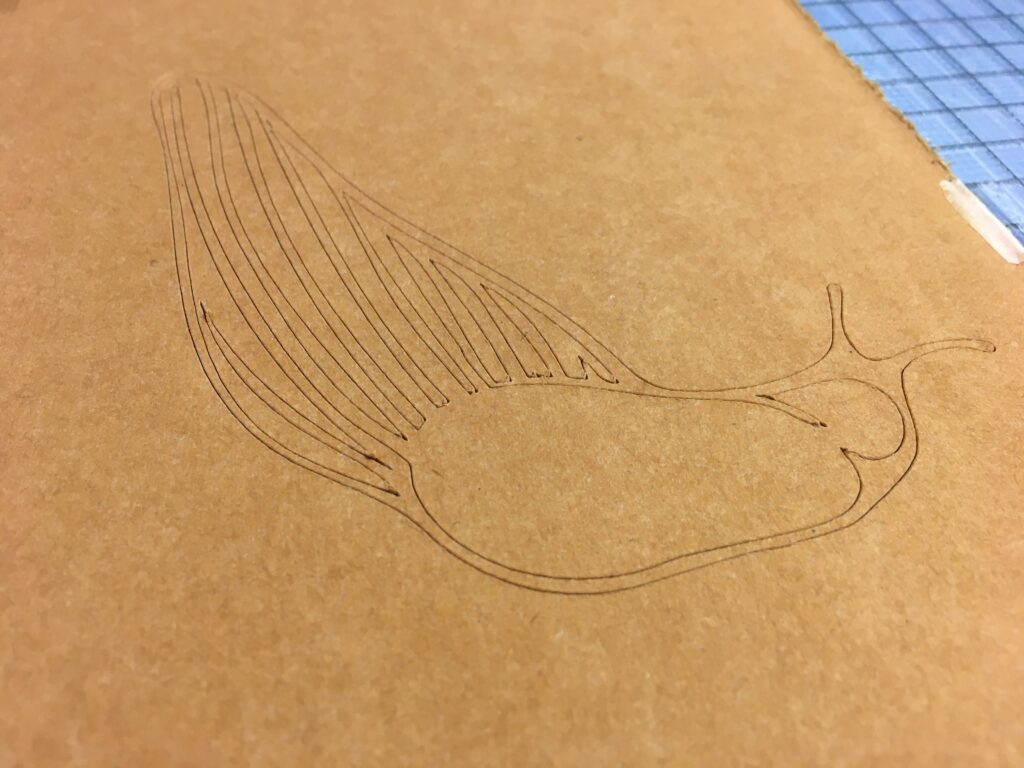
1) First, draw a pattern image you want. This will be a stencil, so if you can avoid island shape (shape in a hole), it makes your life easier. Also, if the lines are too thin, the papp will not print in later process. You will want to make the line at least 2mm or thicker. You can draw on a paper and scan it, or directly draw on computer. I use tablet and tablet pen to draw digitally as I am a bit lazy (ipad + procreate). The image should have high contrast (i.e. black/ white) for the next tracing step.
2) Bring the drawn image into computer (scanning, or simply exporting the file from drawing software). The file format could be jpeg or tiff, png… Then you can use inkscape to trace the outline of your drawing. Here you can find the detailed tutorial >> https://inkscape.org/doc/tutorials/tracing/tutorial-tracing.html
Inkscape is an open source project and you can download it for free for mac, windows or linux. After tracing the line to vector line, save the file as .svg
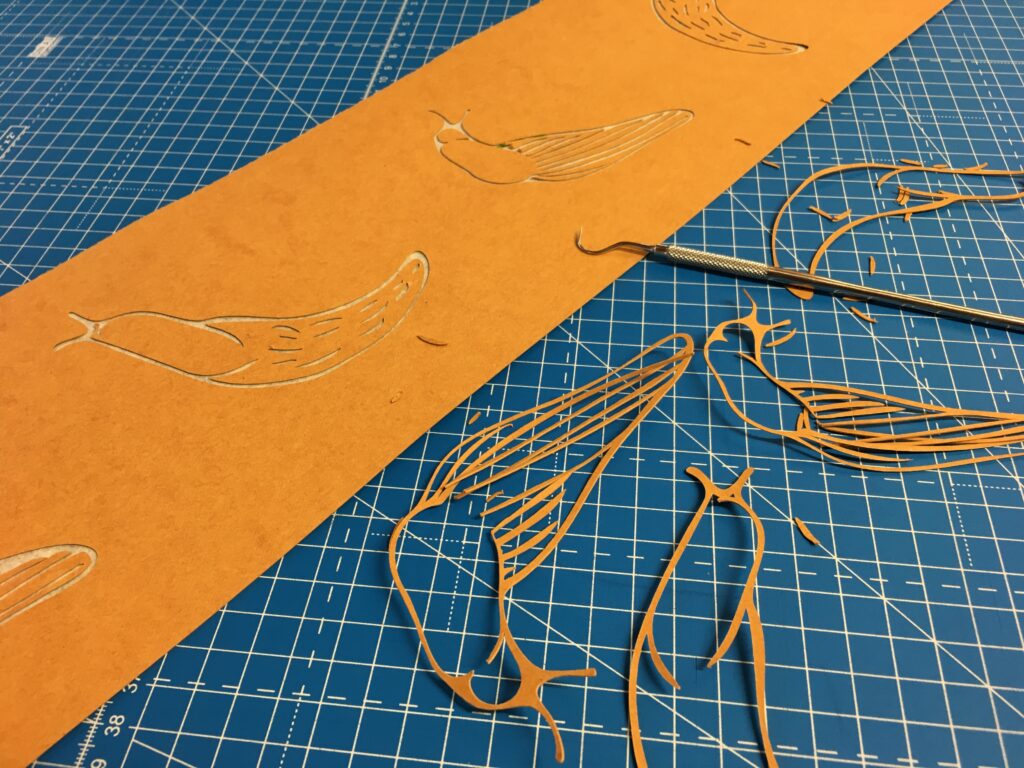
3) Open the svg file in inkscape. now you want to select all the paths you want for the stencil and “combine” the path. now when you select one of the line, it selects all the shapes. You can see the size of your cut lines on the top left corner (if it is px, change to mm). you can scale the image in case it is too big or small. It maybe helpful to print your pattern at this point to check how big they are in real size. Save the scaled version as .svg file.
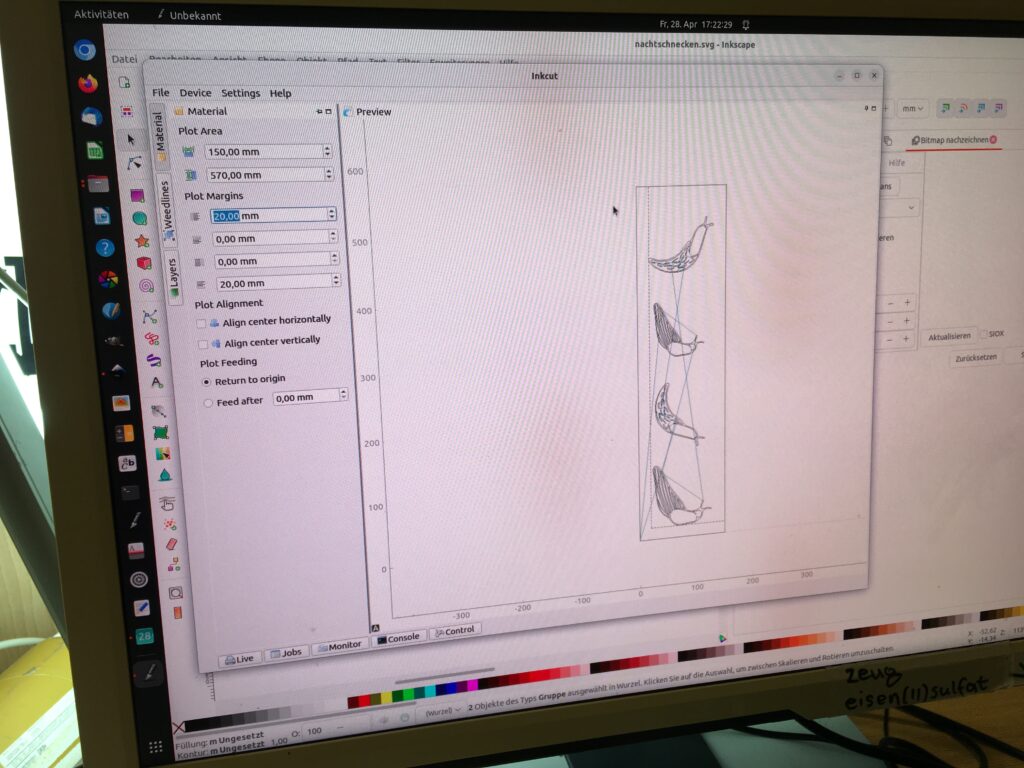
4) (this is the setup at Zeugfäberei, this will be different depending on which plotter you use and which software is set up for it) Open the svg file with Inkcut software. Change the material size to give at least 4cm extra space for each side.
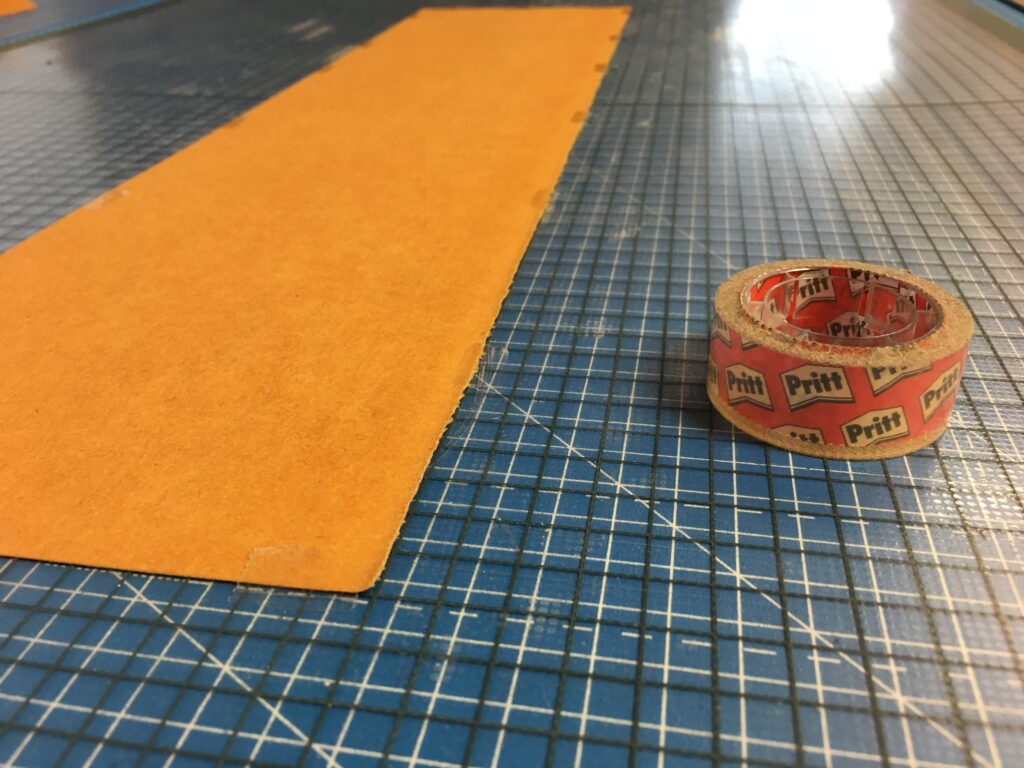
5) Place the snap pap onto cutting sheet. Check the material size on ink cut and cut out exact size. Place the piece straight on the cutting sheet and stick it well. Add extra scotch tape to make sure the snap pap stays on the sheet.

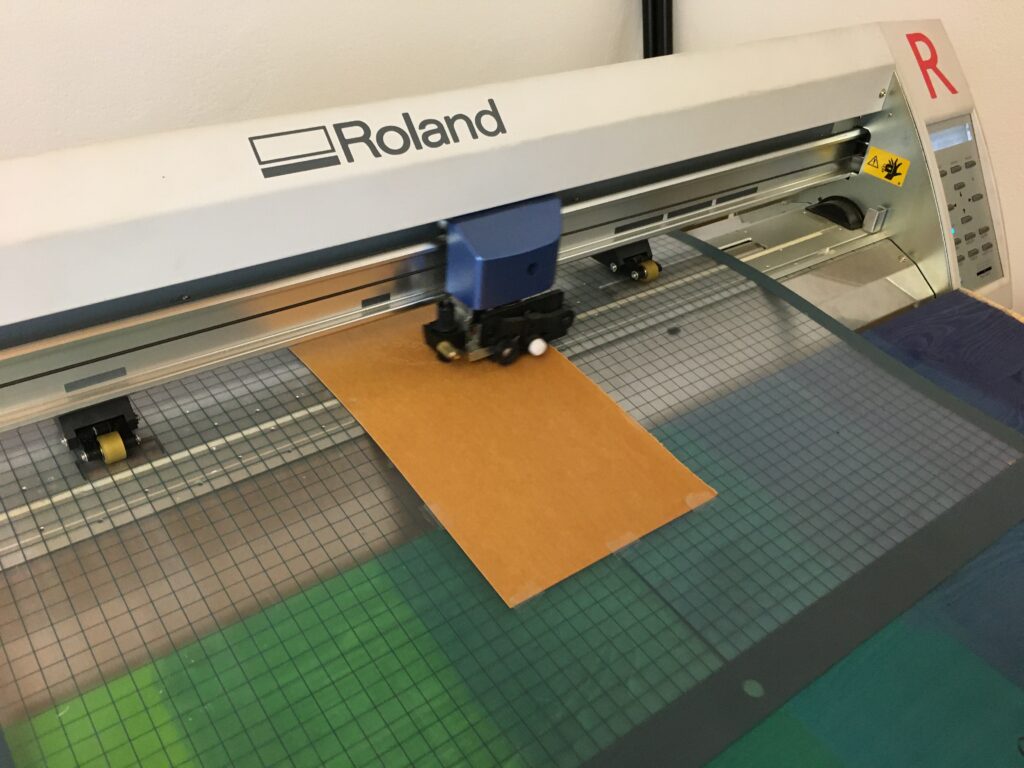
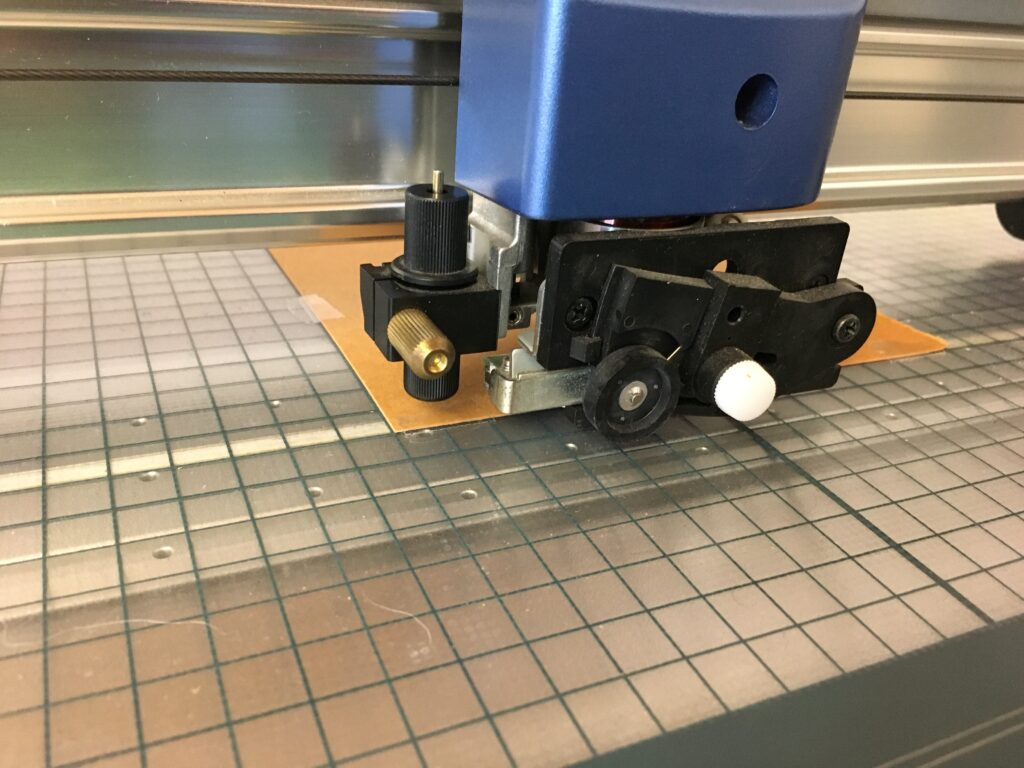
5) For Roland plotter at Zeugfäberei, we used paper knife (red) with force 210g. We had to set the knife on the holder slightly up (thickness of the snap pap) so that when the knife moves to next position, it does not cut the material. In the ink cut software, I set speed of the movement to slow (need to check exact number) and over cut at the edge as 0.8mm. Set the origin of the knife position to left bottom corner of the material, then start cutting by selecting “send to device”. I repeat the cutting 3 times to make sure it cuts through the material.
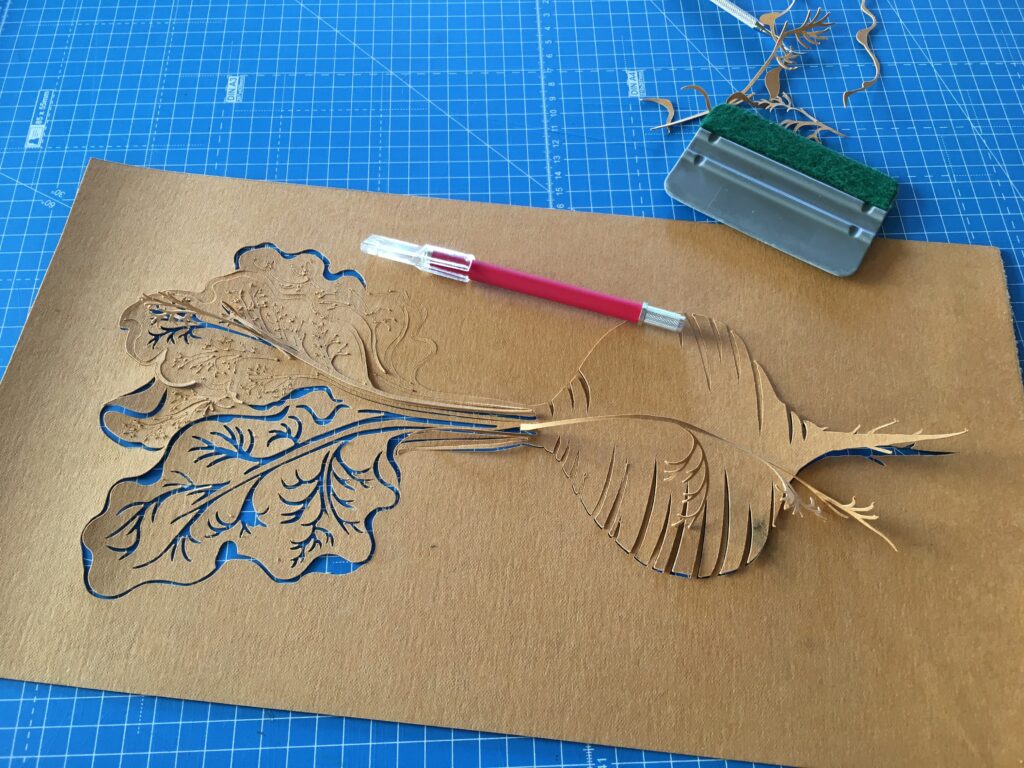
6) After the cutting process, take the sheet out of the machine and peal of the snap pap from the sheet and take out the excess parts. often the edge does not cut through and I have to use design knife to cut off cleanly.
All the svg files used to cut the KATA stencils for Indigo Hyphae is posted here >> https://cloud.servus.at/s/3P2jgQ8gR5L4rdd
The files are open source. Please feel free to download, use and modify it!