Again, transistor switch.
Can you build transistor switch with DC motor circuit?
- DC motor with 5V power supply directly from Arduino
- TIP122 transistor
- protection diode
- push button
- pull down resistor
Challenge:
When you press the button once, the motor starts to turn. When you press the button the second time, the motor stops.
SMA (Shape Memory Alloy)
“A shape-memory alloy (SMA, smart metal, memory metal, memory alloy, muscle wire, smart alloy) is an alloy that “remembers” its original shape and that when deformed returns to its pre-deformed shape when heated. “
from wikipedia

Here is a very nice tutorial on how to use SMA
http://makingfurnitureinteractive.wordpress.com/category/course-materials/page/2/
or this very nice tutorial by Jie Qi
http://fab.cba.mit.edu/classes/MIT/863.10/people/jie.qi/flexinol_intro.html
For today, we use copper tape, paper and scotch tape to make our SMA actuator.
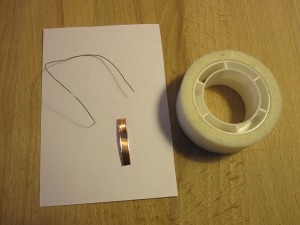
Make the electrical connection to SMA with copper tape by sticking it on the paper. Note: you can not solder SMA
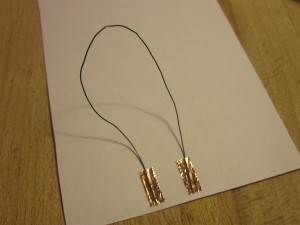
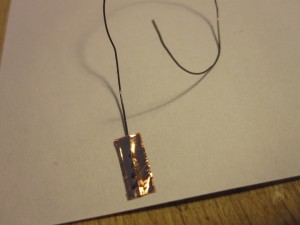
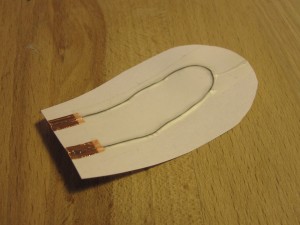
Then stick the whole SMA on the paper with scotch tape and cut it into the desired shape. you do not have to make the U shape with SMA like the example.
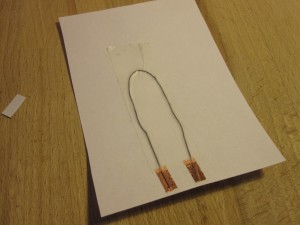
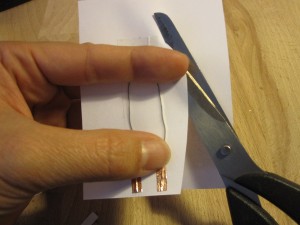
Now, you get the SMA ready to be connected
Now we have to calculate so that we limit the current going through the wire.
resistor (Ohms) = (power supply(Volts) /current required to make the muscle move(Amps) ) – total resistance of the muscle (Ohms)
power supply: 9V, if we use 9V battery
current required to make the muscle move: 200 mA
strong>total resistance of the muscle: Measure it with the multimeter
Here is the datasheet
https://www.tinkersoup.de/en/widgets/flexinol-0-012-diameter-1-foot/a-1190/
https://www.tinkersoup.de/en/motoren-robotics/flexinol-0-005-diameter-1-foot/a-1189/
Ok, now you know the resistance you need. Connect Battery(+)-resister-SMA-Battery(-) with crocodile clip and see what will happen. Do not leave it too long as it may get too hot.
But won’t it be nice if you could control the activate/deactivate of SMA from Arduino rather than I move the crocodile clip?
You can do this by using Transistor switch also. But this time, we need a special kind of transistor called mosFET(metal–oxide–semiconductor field-effect transistor )
“The metal–oxide–semiconductor field-effect transistor (MOSFET, MOS-FET, or MOS FET) is a transistor used for amplifying or switching electronic signals. Although the MOSFET is a four-terminal device with source (S), gate (G), drain (D), and body (B) terminals,[1] the body (or substrate) of the MOSFET is often connected to the source terminal, making it a three-terminal device like other field-effect transistors. Because these two terminals are normally connected to each other (short-circuited) internally, only three terminals appear in electrical diagrams. The MOSFET is by far the most common transistor in both digital and analog circuits, though the bipolar junction transistor was at one time much more common.”
from Wikipedia
There are also N type and P type mosFET. For today, we use N type mosFET IRLML0030
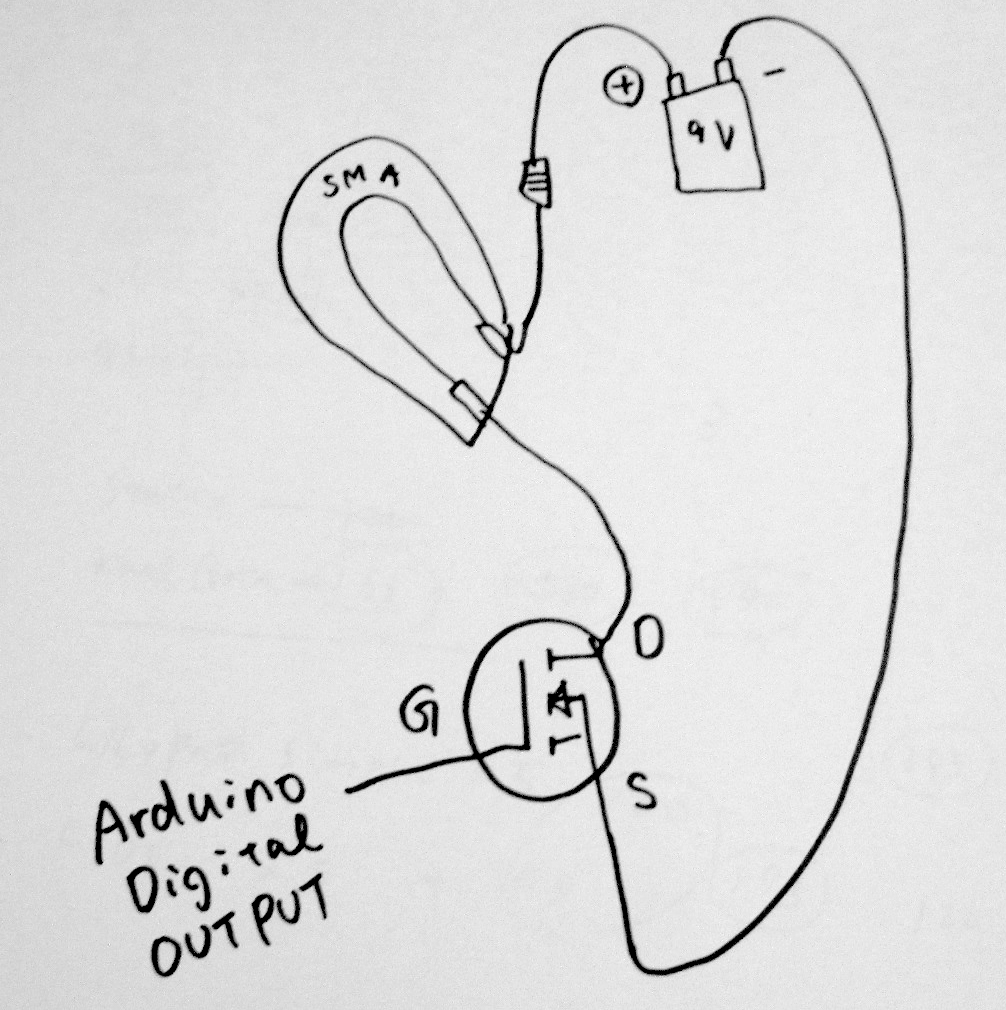
The 3 pins are
Gate: This is the pin to control the switching between Drain and Source.
Drain: When voltage is applied to Gate, Drain gets connected to Source electrically.
Source: connect to GND
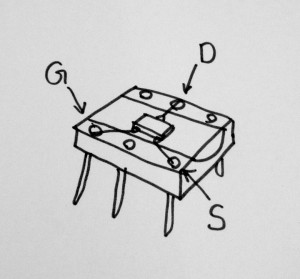
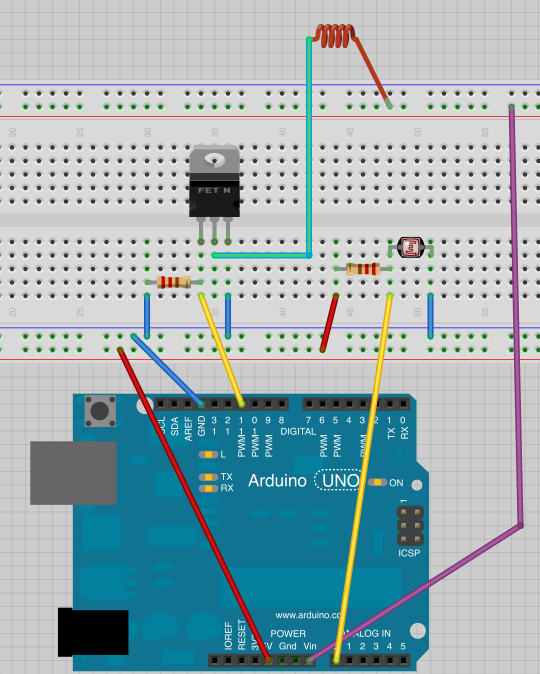
Here is a diagram on how to connect
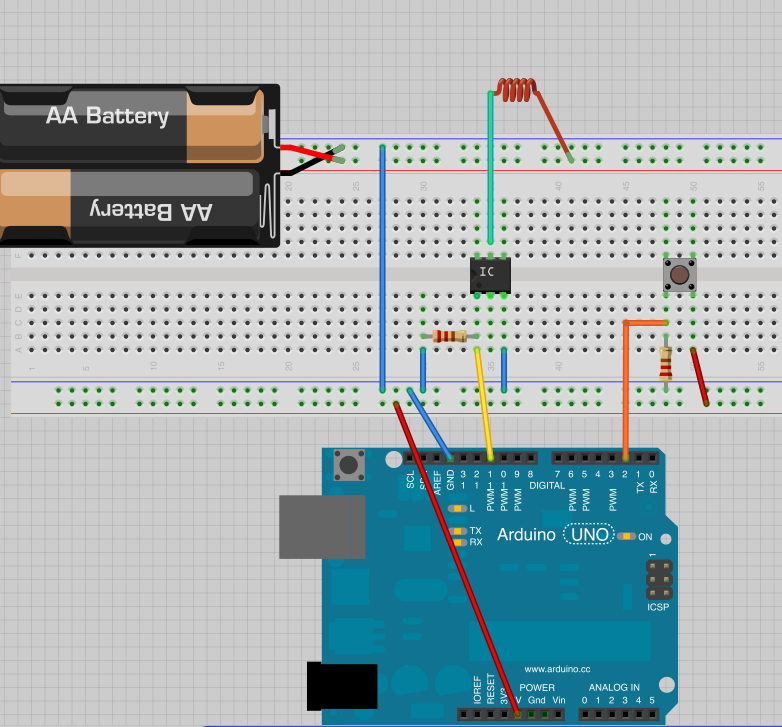
and here is a breadboard view
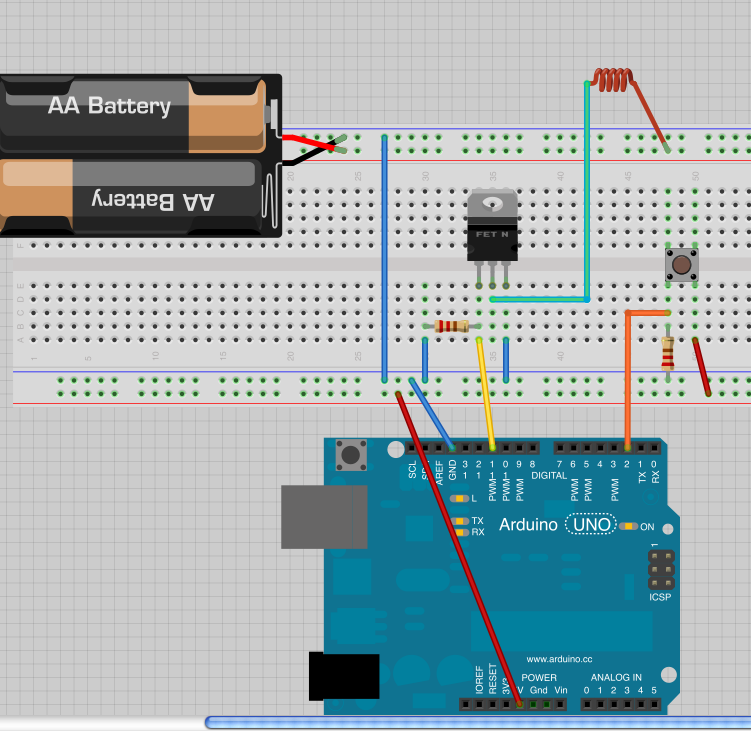
If you are using IRLB8743
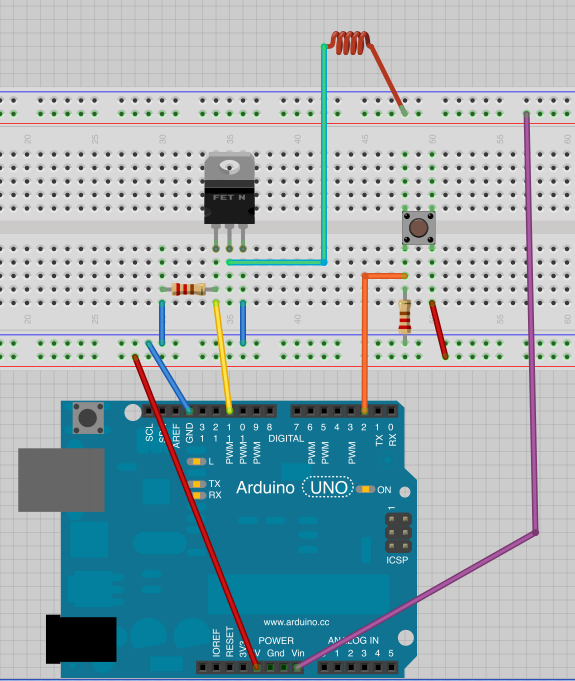
If you are using IRLB8743 with 12V power supply on Arduino instead of battery
Open the Button sketch and change the pins accordingly. Upload to your Arduino and see if you can control the SMA.
If you use analog sensor like photocell, and if you want to turn on/off the SMA with threshold, here is the example code.
————–
/*
AnalogReadSerial + threshold
Reads an analog input on pin 0, prints the result to the serial monitor.
Attach the center pin of a potentiometer to pin A0, and the outside pins to +5V and ground.
If the sensor value is smaller than threashold value, it turns on the switch to SMA (shape memory alloy)
This example code is in the public domain.
*/
int sensorValue=0;
int SMA=9;
// the setup routine runs once when you press reset:
void setup() {
// initialize serial communication at 9600 bits per second:
Serial.begin(9600);
pinMode(SMA,OUTPUT);
}
// the loop routine runs over and over again forever:
void loop() {
// read the input on analog pin 0:
sensorValue = analogRead(A0);
// if the sensorValue is smaller than 550 (threashold)
if (sensorValu5 > 550){
//Turn on the SMA pin
digitalWrite(SMA,HIGH);
// and wait for 1 sec
delay(1000);
// turn off the SMA pin
digitalWrite(SMA,LOW);
}
else{ //otherwise
// do nothing
}
// print out the value you read:
Serial.println(sensorValue);
delay(10); // delay in between reads for stability
}
—————-
connection example: