Step1: Install Arduino Software
Download software from
http://arduino.cc/en/Main/Software
Then you can read how to install form here
http://arduino.cc/en/Guide/HomePage
step2: Install dricers
If you are using windows, follow the instruction here
http://arduino.cc/en/Guide/Windows
you will need to install the driver.
As we have Arduino Pro Micro, please also install the Pro micro driver from here >> https://github.com/sparkfun/SF32u4_boards/archive/master.zip
After you download the file, unzip it and place the whole folder on
your Documents/Arduino/hardware
The older board (i.e. Arduino Duemilanove) needs FTDI driver.
You can download it from here
http://www.ftdichip.com/Drivers/VCP.htm
Then follow these instructions to install.
mac >> http://arduino.cc/en/guide/macOSX
read “3 | Install the Software” part
windows>> http://arduino.cc/en/guide/windows
read “4 | Install the drivers”, Installing drivers for the Arduino Duemilanove, Nano, or Diecimila with Windows7, Vista, or XP:
step3: Open Blink sketch on software
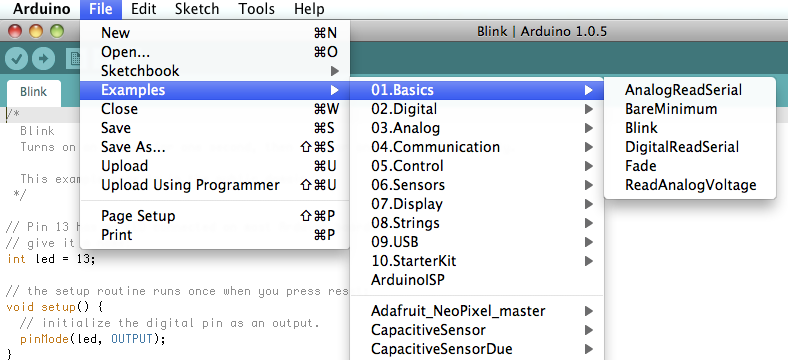
Open Blink example sketch from File/Examples/Basic/Blink
If you have Pro Micro, change
int led = 13;
to
int led =9;
Place Pro Micro on the breadboard, add LED on pin 9 (Anode) and GND (Cathode)
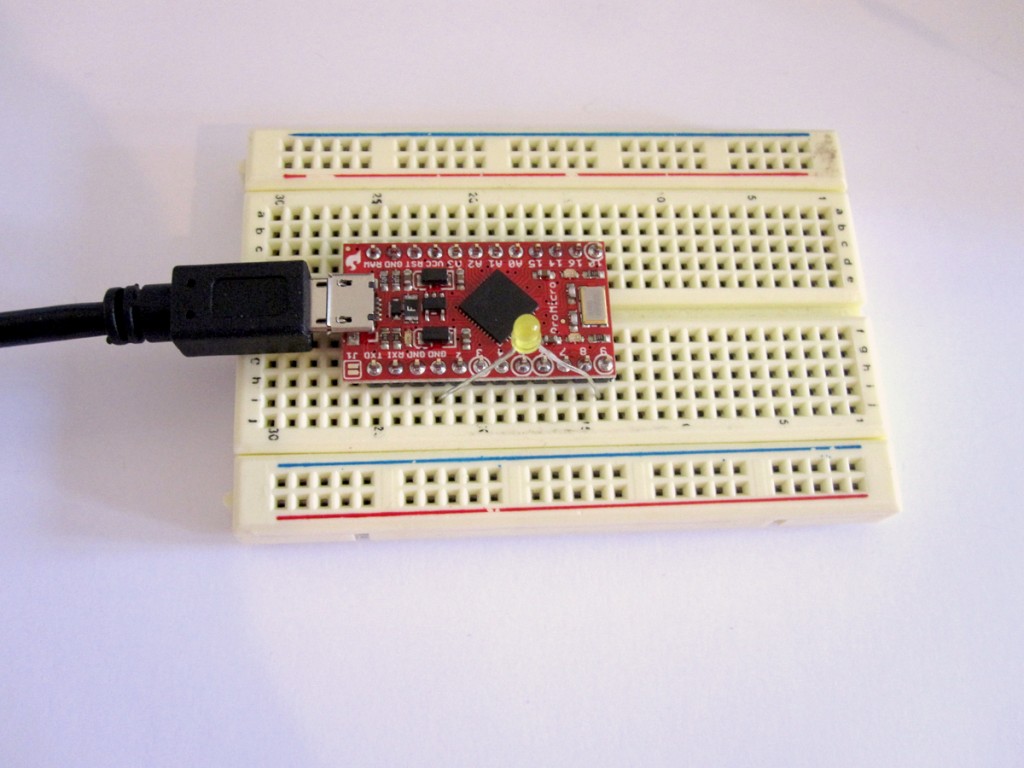
more about breadboard >>
step4: Upload the sketch to Arduino

Select the Arduino kind you are using from Tools/Board
If you are using Pro Micro, make sure you choose “Sparkfun Pro Micro”
There are 3.3V 8MHz and 5V 16MHz
What we have today is 3.3V 8MHz
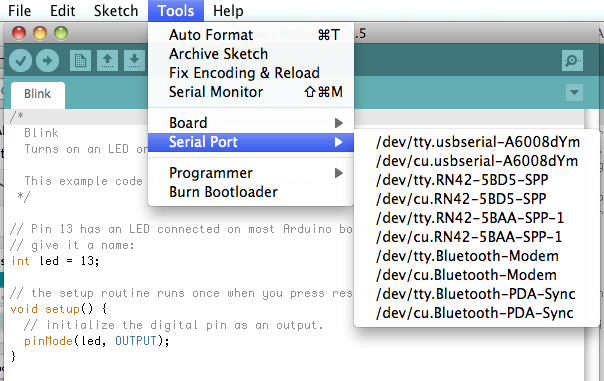
Select the the port your Arduino is connected to, from Tools/Serial Port
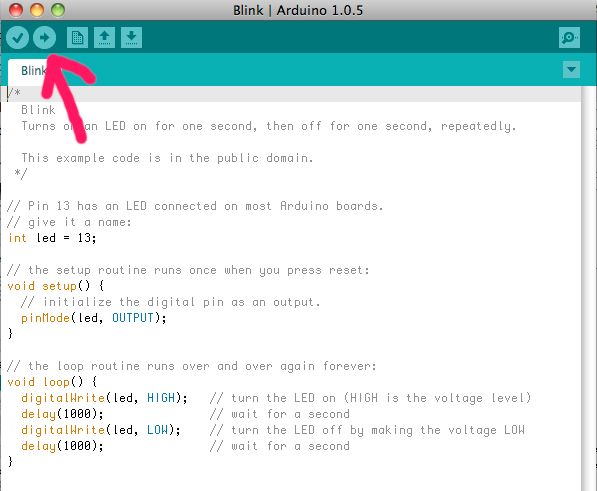
click the arrow button and upload the sketch to Arduino
step5: Yey! it is blinking!!
Is your on-board LED (LED connected to pin 13) blinking?