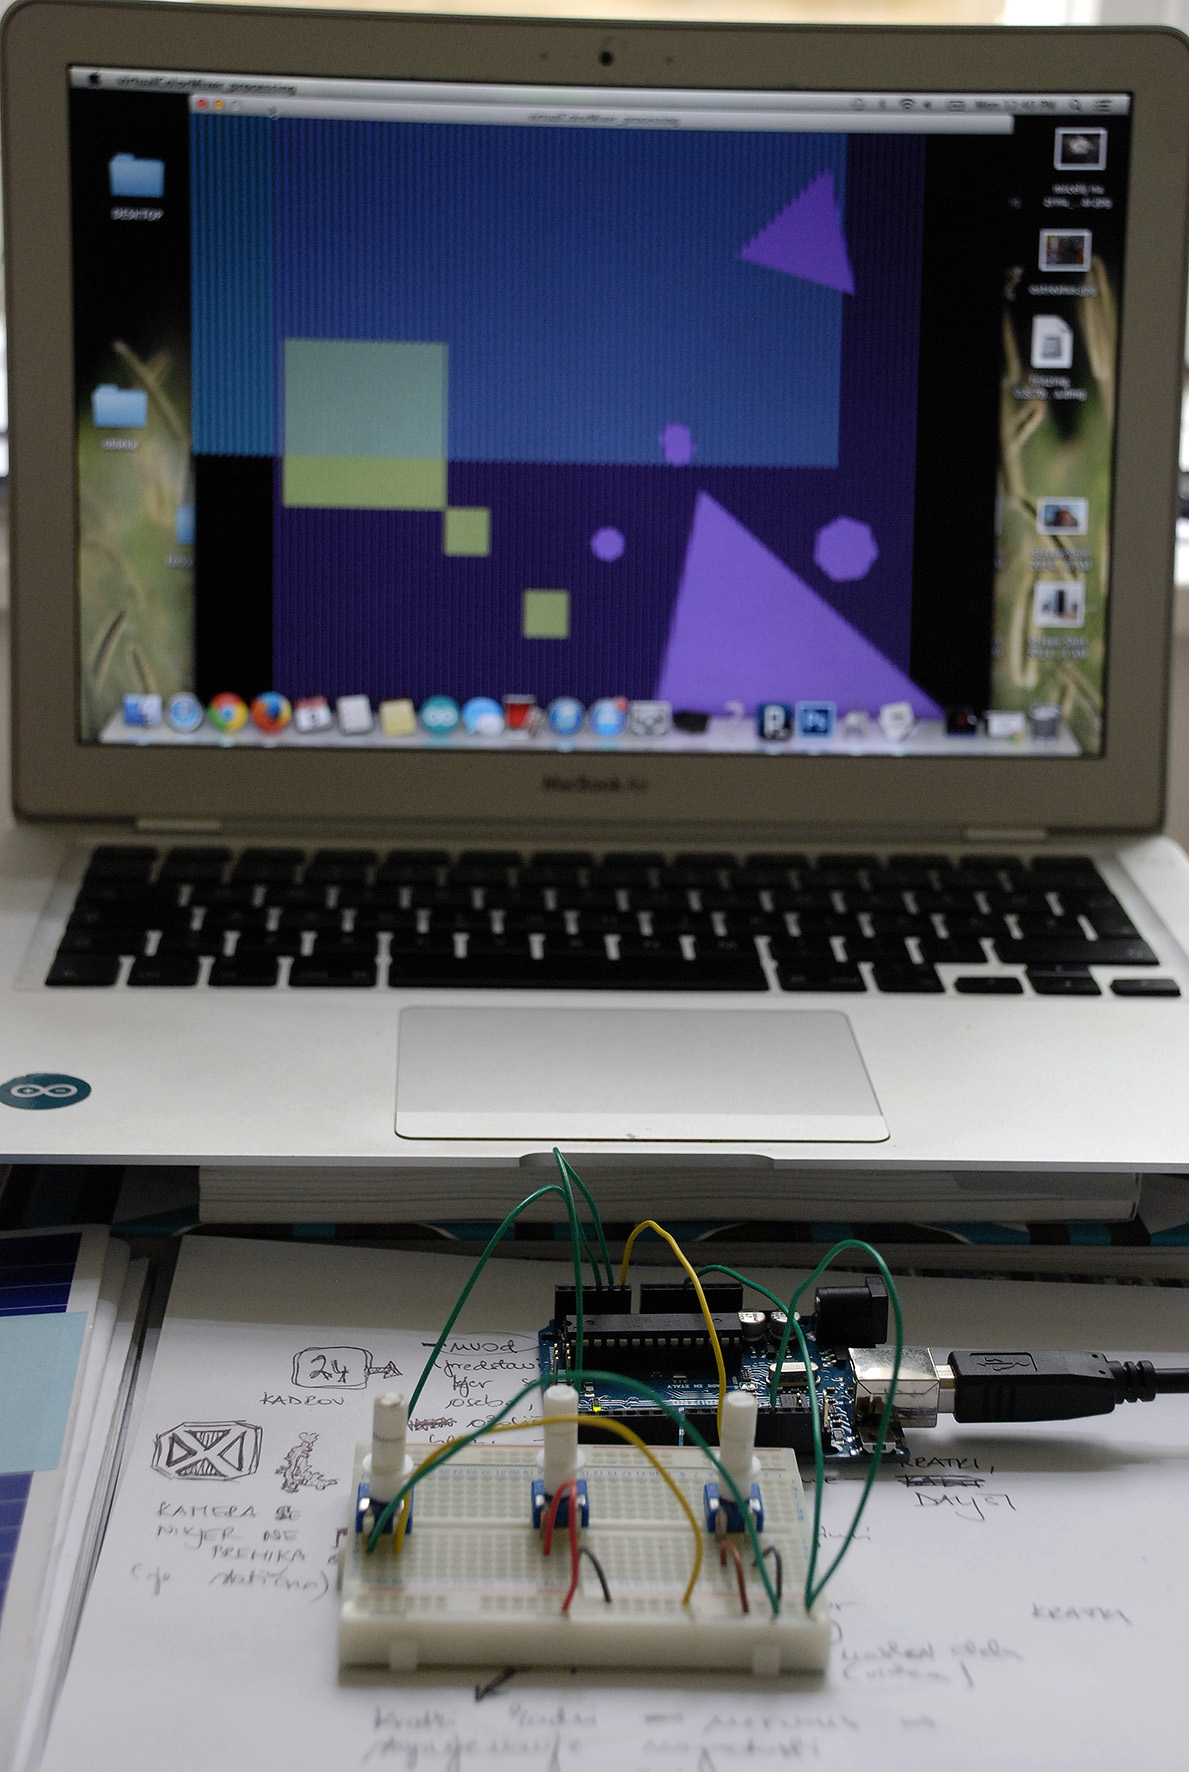
For connection I used 3 potentiometers pinned to A0, A1 and A2.
And the processing code:
// This example code is in the public domain.
import processing.serial.*;
float redValue = 0; // red value
float greenValue = 0; // green value
float blueValue = 0; // blue value
float xPos=0;
float yPos=0;
Serial myPort;
void setup() {
size(1000, 800);
// List all the available serial ports
println(Serial.list());
// I know that the first port in the serial list on my mac
// is always my Arduino, so I open Serial.list()[0].
// Open whatever port is the one you’re using.
myPort = new Serial(this, Serial.list()[4], 9600);
// don’t generate a serialEvent() unless you get a newline character:
myPort.bufferUntil(‘\n’);
}
void draw() {
// set the background color with the color values:
background(0);
fill(greenValue, blueValue, redValue);
rect(xPos-200, yPos-200, 200, 200);
noStroke();
fill(greenValue, blueValue, redValue);
rect(xPos, yPos, 55, 55);
noStroke();
fill(greenValue, blueValue, redValue);
rect(xPos+100, yPos+100, 55, 55);
noStroke();
for (int i = 0; i < height; i += 10) {
fill(redValue, greenValue, blueValue);
rect(i, 0, 5, 400);
}
for (int i = 0; i < height; i += 10) {
fill(greenValue, redValue, blueValue);
rect(100+i, 0, 2, height);
}
pushMatrix();
translate(width*0.8, height*0.4);
rotate(frameCount / 40.0);
polygon(0, 200, 90, 3);
popMatrix();
pushMatrix();
translate(width*0.8, height*0.4);
rotate(frameCount / -50.0);
polygon(0, 400, 300, 3);
popMatrix();
pushMatrix();
translate(width*0.5, height*0.5);
rotate(frameCount / 50.0);
polygon(100, 0, 20, 7);
popMatrix();
pushMatrix();
translate(width*0.5, height*0.5);
rotate(frameCount / 30.0);
polygon(100, 0, 20, 7);
popMatrix();
pushMatrix();
translate(width*0.5, height*0.5);
rotate(frameCount / 80.0);
polygon(100, 0, 20, 7);
popMatrix();
pushMatrix();
translate(width*0.8, height*0.5);
rotate(frameCount / -100.0);
polygon(20, 100, 40, 7);
popMatrix();
}
void polygon(float x, float y, float radius, int npoints) {
float angle = TWO_PI / npoints;
beginShape();
for (float a = 0; a < TWO_PI; a += angle) {
float sx = x + cos(a) * radius;
float sy = y + sin(a) * radius;
vertex(sx, sy);
}
endShape(CLOSE);
}
void serialEvent(Serial myPort) {
// get the ASCII string:
String inString = myPort.readStringUntil(‘\n’);
if (inString != null) {
// trim off any whitespace:
inString = trim(inString);
// split the string on the commas and convert the
// resulting substrings into an integer array:
float[] colors = float(split(inString, “,”));
// if the array has at least three elements, you know
// you got the whole thing. Put the numbers in the
// color variables:
if (colors.length >=3) {
// map them to the range 0-255:
redValue = map(colors[0], 0, 1023, 0, 255);
greenValue = map(colors[1], 0, 1023, 0, 255);
blueValue = map(colors[2], 0, 1023, 0, 255);
xPos=map(colors[0], 0, 1023, 0, width);
yPos=map(colors[1], 0, 1023, 0, height);
}
}
}
With order in the code you can affect on the colour of the objects and position (front, behind). In this code colour of primitives are defined different, but with the position in the code they are also changing with potentiometers.