Hey everyone,
here is a final update on the outcome of my project.
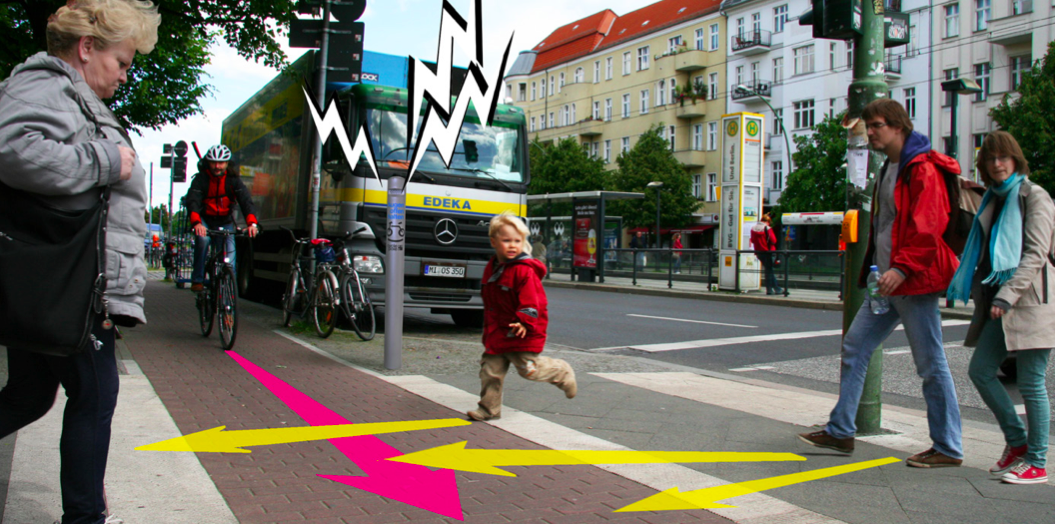
I designed the concept Cycle last summer. One year later, I now got back to the project to ‘make it work’. My goal was to create a fully functioning prototype, to be able to do real life user testing in an exemplary case, S-Bahn Prenzlauer Allee, Berlin.
I put together Hardware and code and started by putting together a 1:1 Quick’n'Dirty Prototype, with adujustable dimensions (heights, widths, position, volume, arrangement). I went straiht to user testing with this and documented everything in videos and fotos. I then turned those insights into according adjustments and started creating internal housings for my existing visual 1:1 prototype. I got back to Prenzlauer Allee for several more rounds of Testing. I am happy to say, that the test gave fairly good results. But it also showed weaknesses of the design and the setup. Anyways, the goal of this was not to verify my design but much rather to get real-life feedback and evaluation on the details of concept.
I gained a lot of insights on the concept Cycle Pole (I might continue now and go on to again turning those into a next round of prototyping and also start getting in touch with local authorities and producers). But I also learned a lot about user testing, prototyping itself and of course electronics and Arduino.
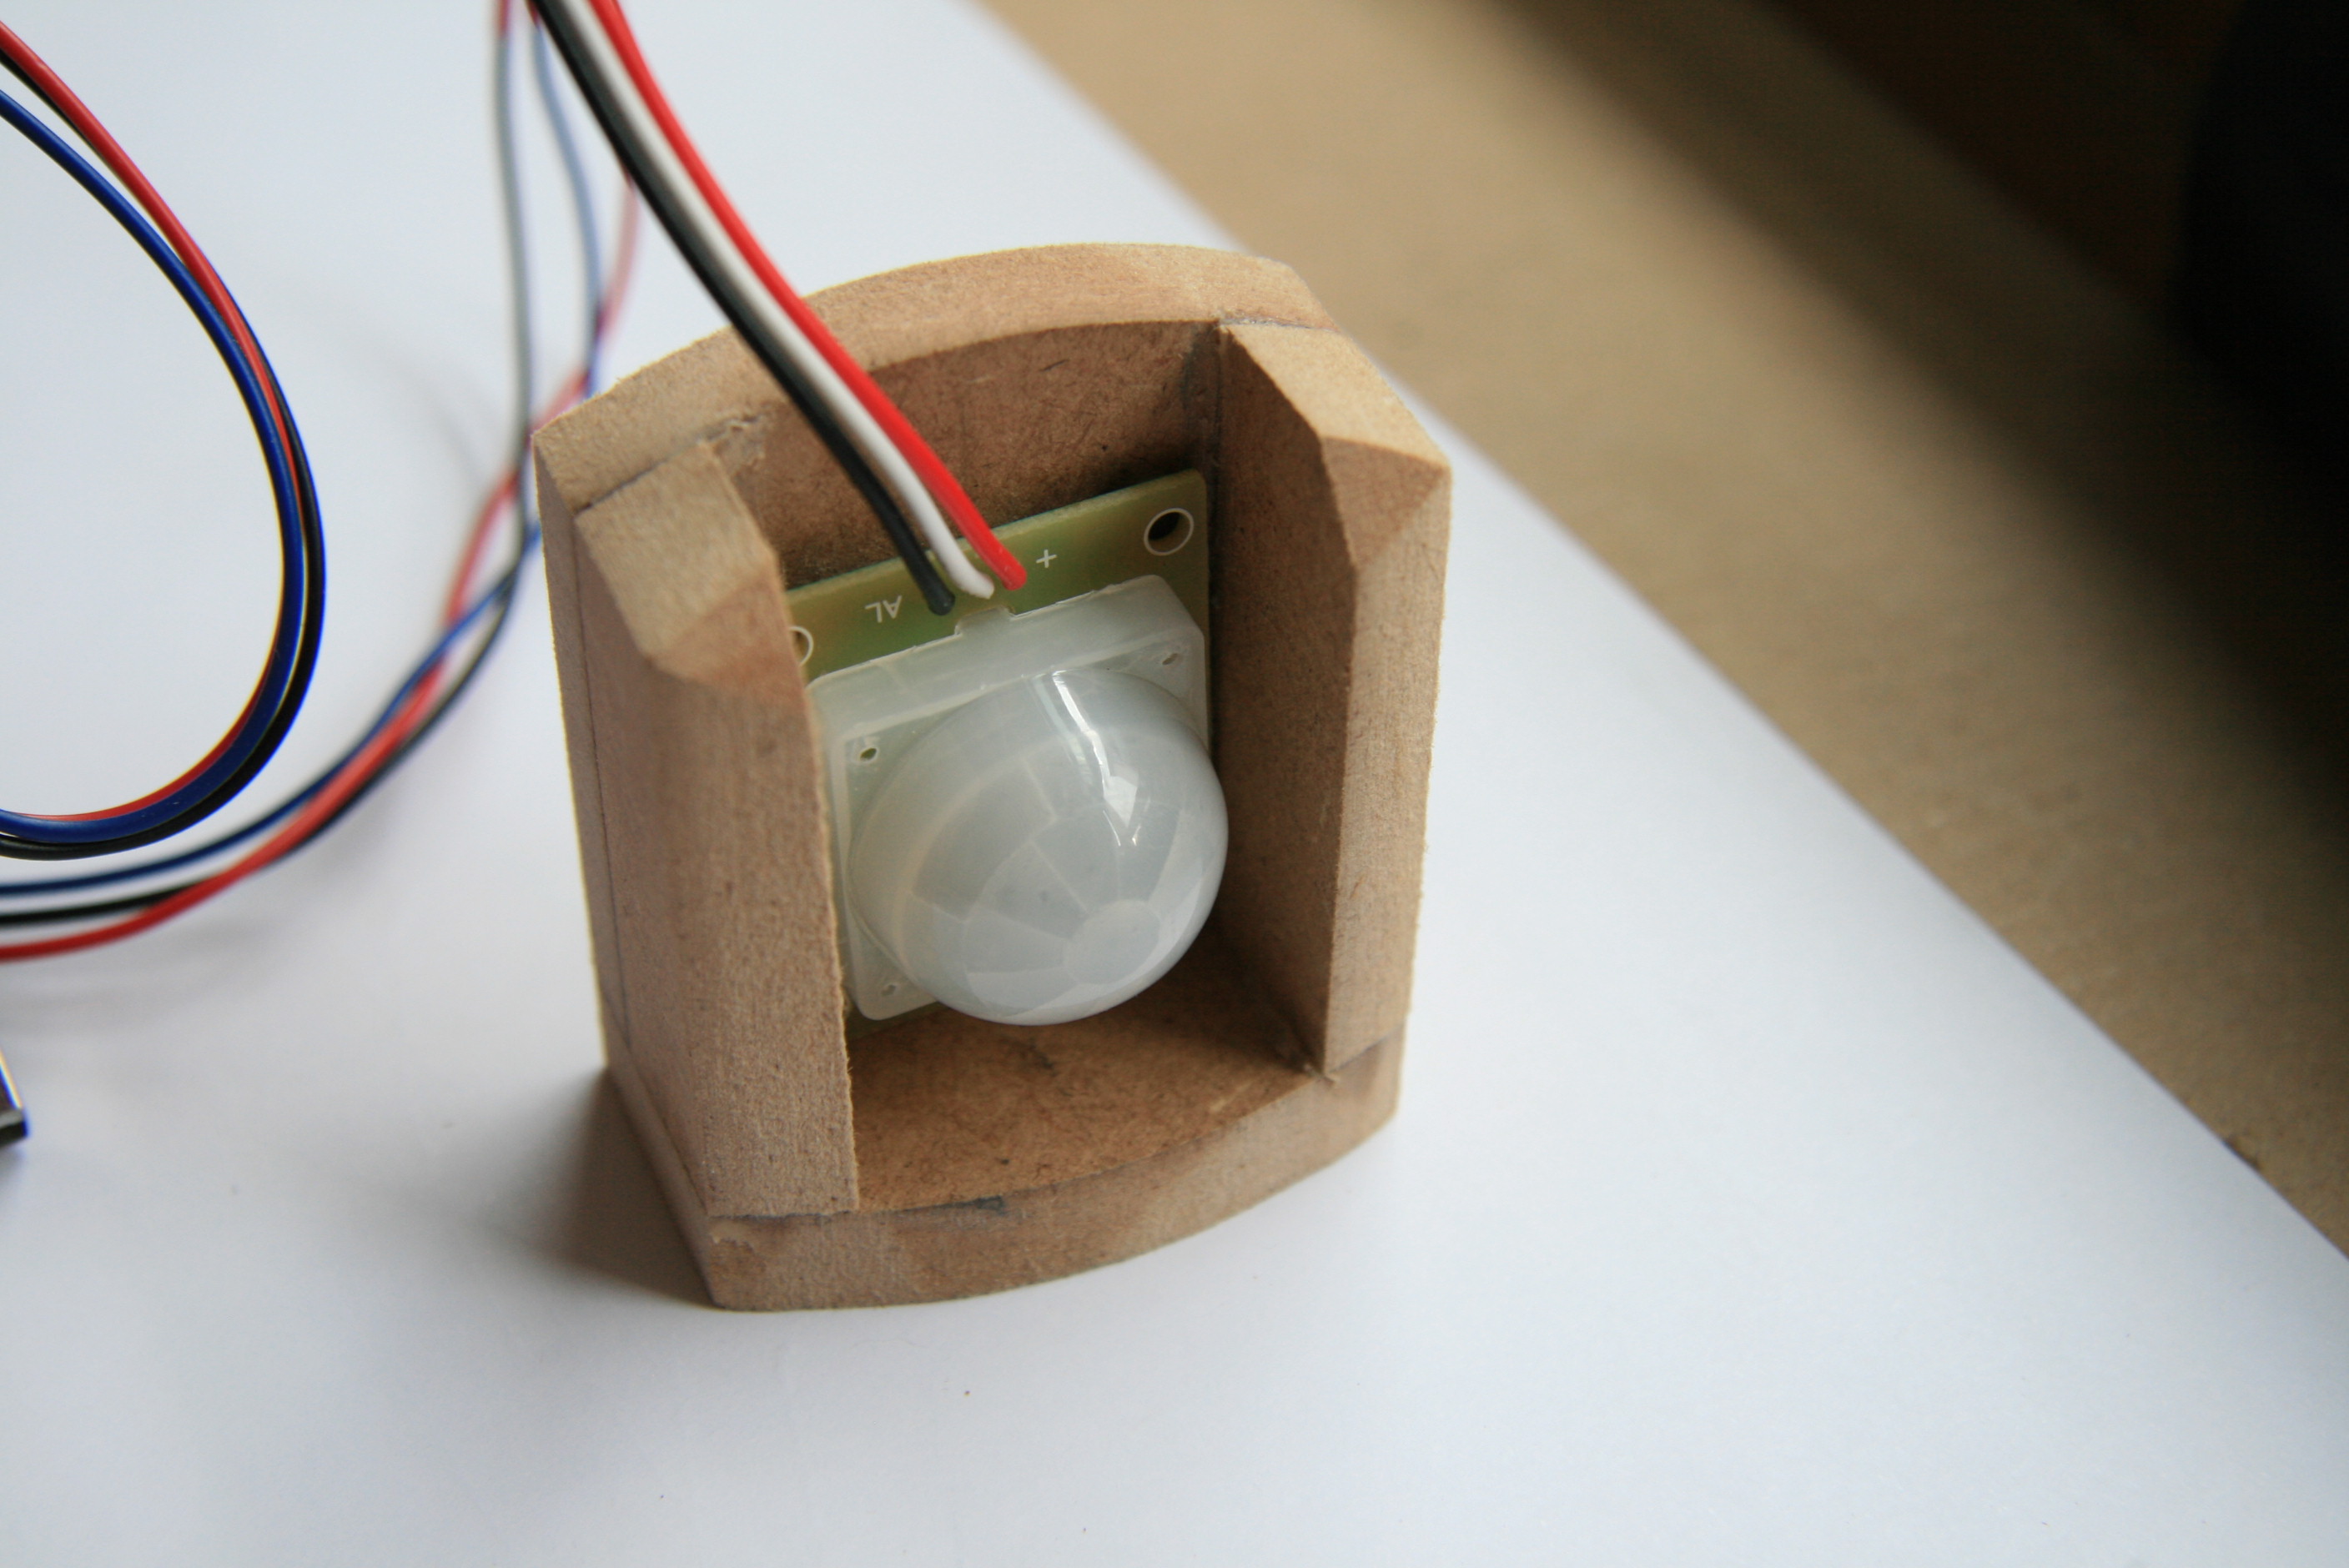
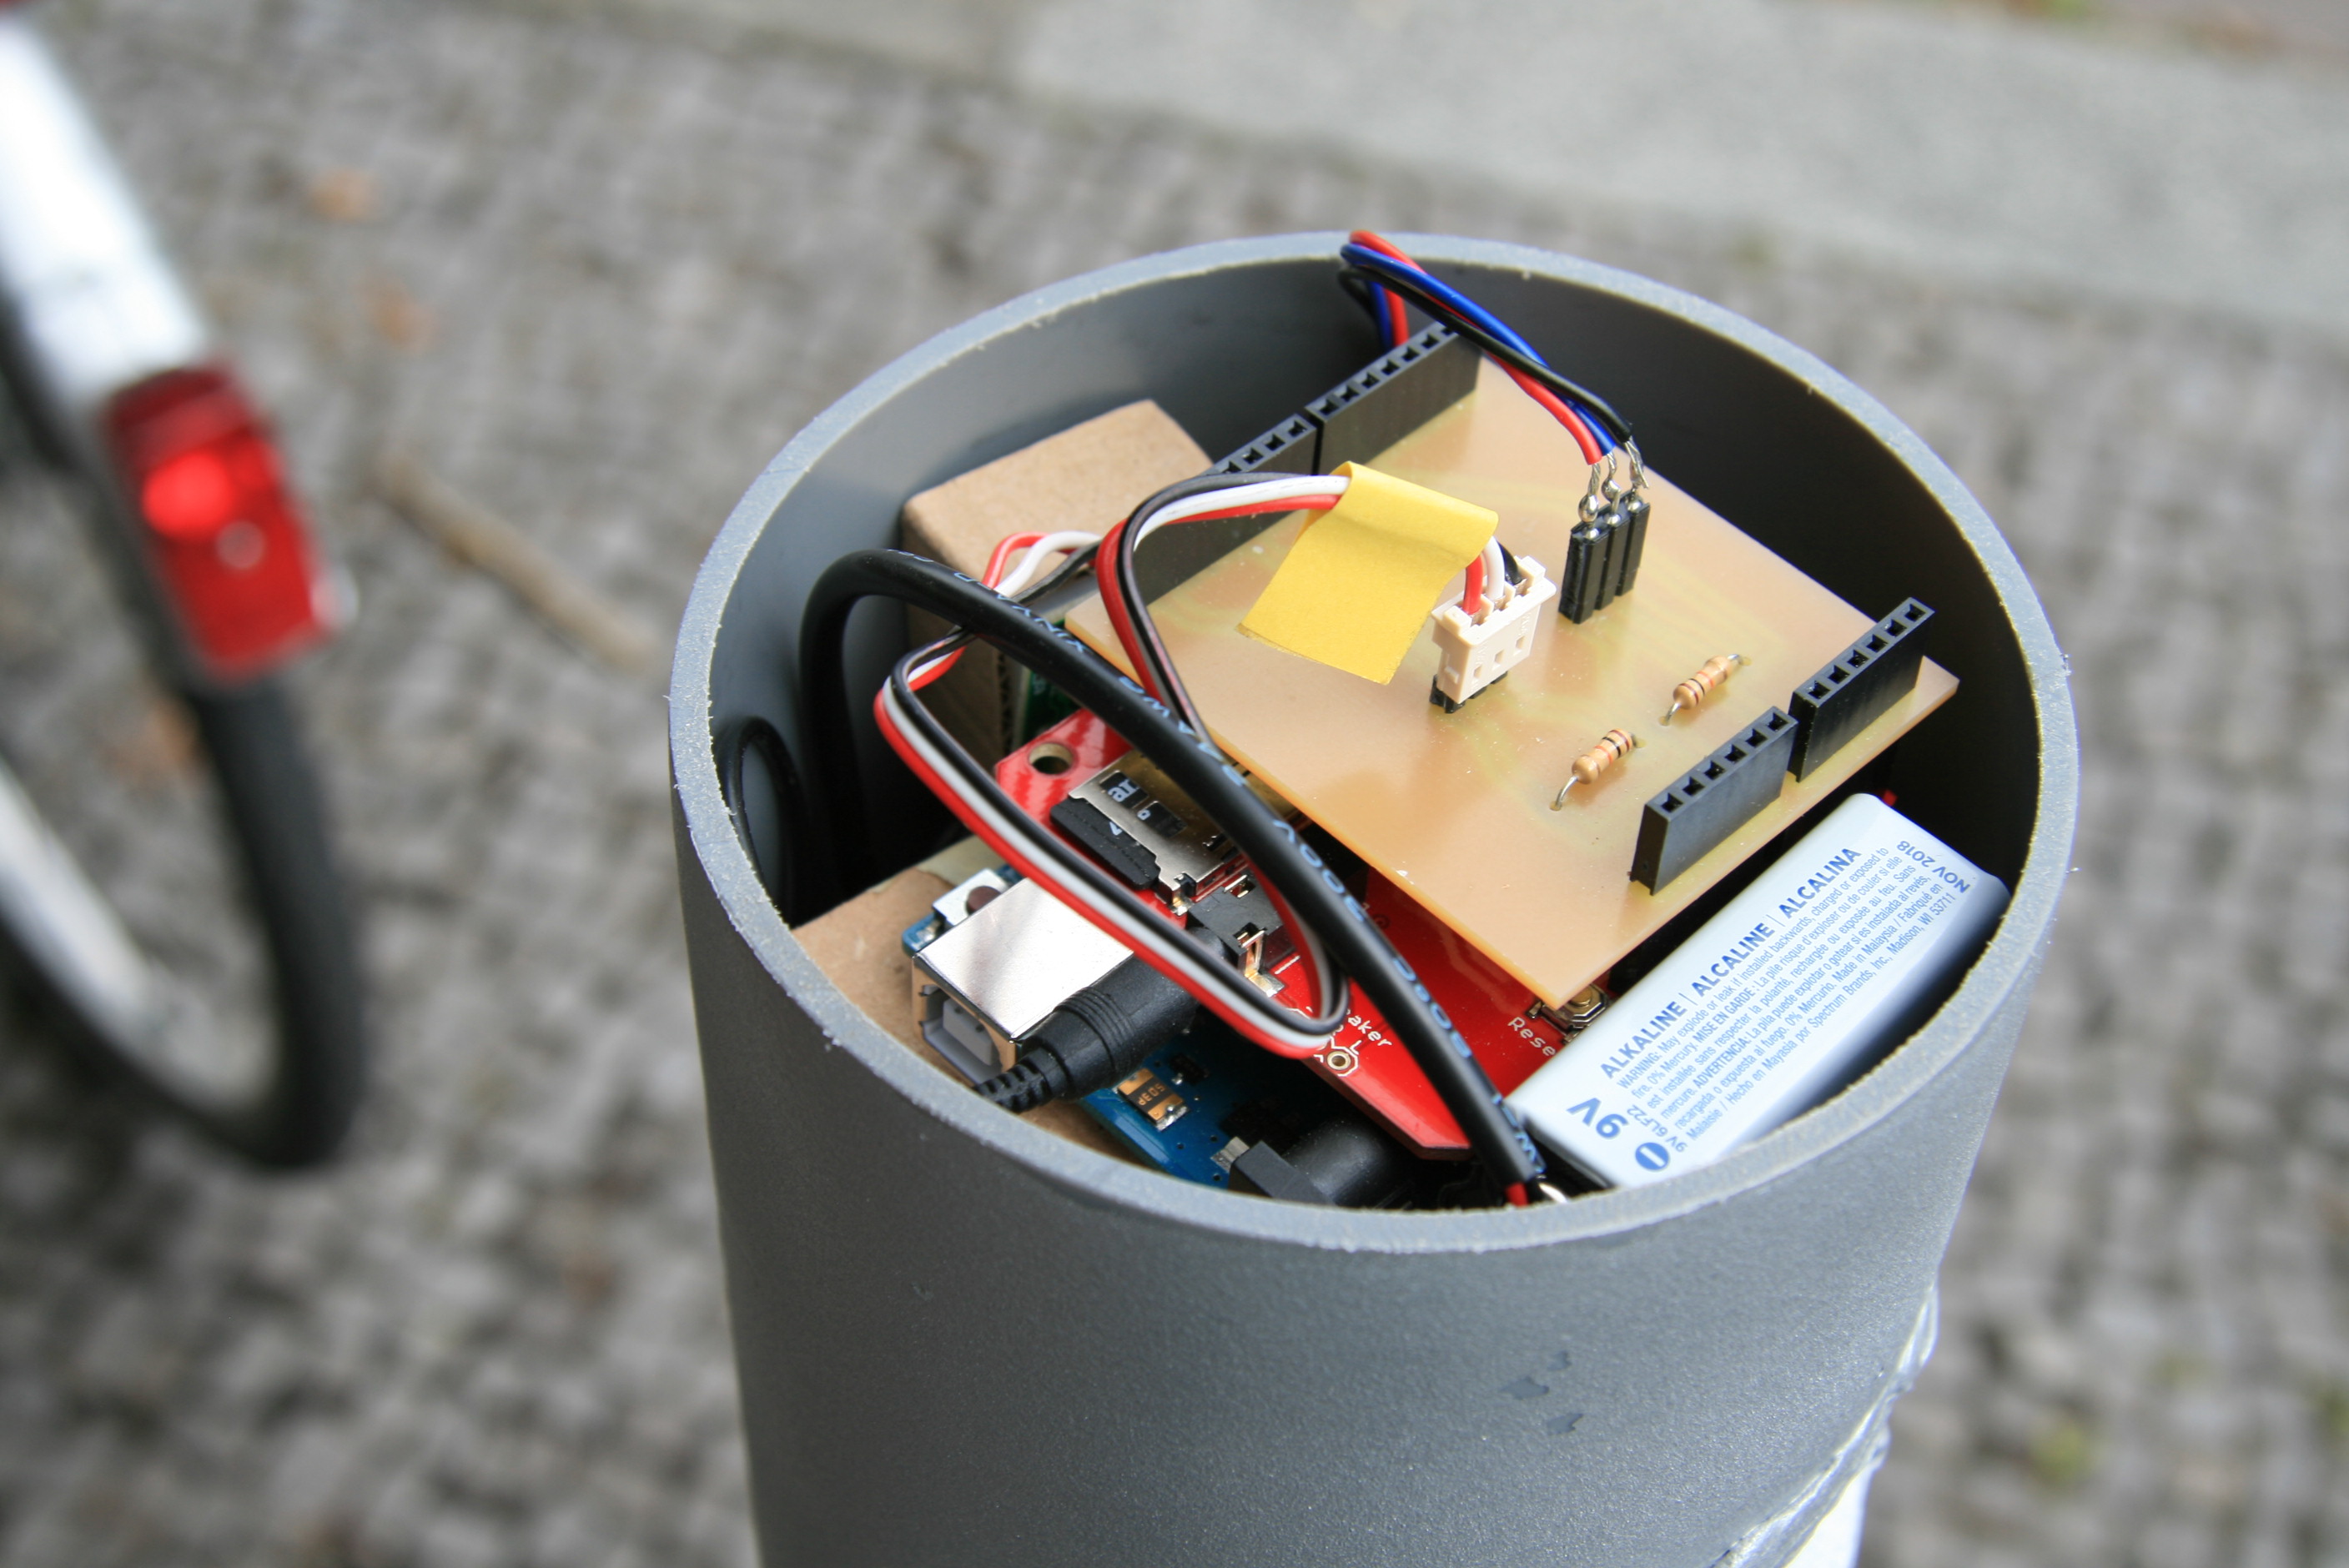
Here are some impressions of the final outcome. I’ll also post my complete code further down – feel free to copy, share and modify non-commercially (CC-BY-NC).
Thanks everyone for a great course!
—

—
Setup:
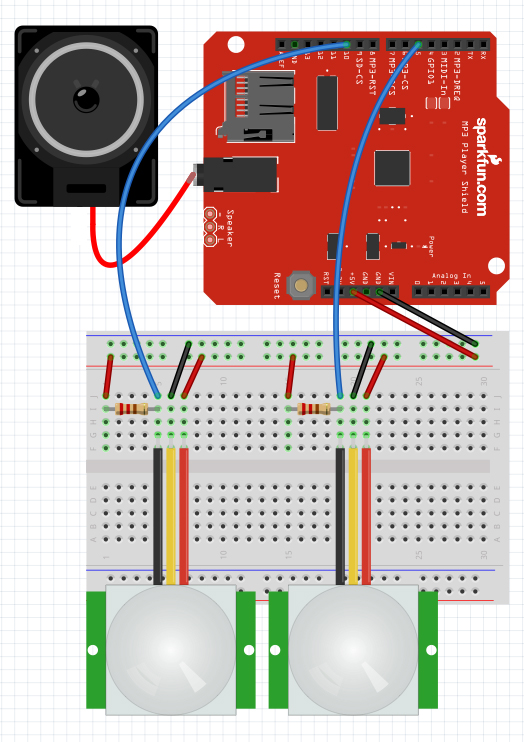
(Note: Due to buggy pin, I’ve exchanged D10 dor D14 (=A0))
—
The following code is under (CC-BY-NC) Licence.
/*
Some parts of this code are based on a sketch by Bill Porter
ans Micahel P. Flaga, also I am using their libraries for the
MP3 Player shield:
https://github.com/madsci1016/Sparkfun-MP3-Player-Shield-Arduino-Library
For infos on how to hook up the MP3 Player shield check out this link:
https://learn.sparkfun.com/tutorials/mp3-player-shield-hookup/all
—
THIS CODE WORKS CORRECTLY WITH A PIR (OR A BUTTON) ON D5 AND
D14 (=A0), THAT ARE PULLED UP TO 5V, WITH 100K.
—
SIDENOTES:
Update: As opposed to version 7, I simplified the sketch by
taking (commenting) out and combining “pedestrian” and “pressed”
to only one variable “recentPedestrian”
Test 1: with buttons it now works perfectly.
Test 2: with a pir for pirPin and a button for pirPin2 still works correctly.
Test 3: with a pir on both, only pirPin (recentPedestrian)
works correctly (as before), pirPin2 (bike) does not REACT,
is on 0 (false) always.
Test 4: with the pir connected to pirPin2 and a button on pirPin
still only the button (recentPedestrian and startTime) reacts,
pirPin2 DOES NOT.
Test 5: Exchanging pirPin 2 for an external PIR, it still
does not correct.
NOTE: Both PIRs themselves are working fine.
Conclusion: The problem must be in the PCB wiring of pirPin2
WRONG!
Actual conclusion: D10 of the mP3Player Shield does not work
correctly with the PIR. D14 (=A0) does.
Note: for random(min,max), min is inclusive and max exclusive.
so in my case of songs 1 – 5 the correct statement is random(1,6).
*/
#include <SPI.h> // SPI library
#include <SdFat.h> // SDFat Library
#include <SdFatUtil.h> // SDFat Util Library
#include <SFEMP3Shield.h> // Mp3 Shield Library
SdFat sd; // Create object to handle SD functions
SFEMP3Shield MP3player; // Create Mp3 library object
const uint8_t volume = 0; // MP3 Player volume 0=max, 255=lowest (off)
const uint16_t monoMode = 1; // Mono setting 0=off, 3=max
/* Constant variables */
int pirPin = 5;
int pirPin2 = 14;
int calibrationTime = 10;
byte result; // variable for mp3 player shield, can be used to debug
/* Changing variables*/
int buttonState = 0;
int lastButtonState = 0;
int buttonState2 = 0;
int lastButtonState2 = 0;
boolean bike = false;
boolean recentPedestrian = false;
unsigned long startTime = 0;
unsigned long interval = 4000;
unsigned long currentMillis = 0;
/* Setup */
void setup()
{
pinMode(pirPin, INPUT);
pinMode(pirPin2, INPUT);
initSD();
initMP3Player();
Serial.begin(9600);
}
/* Loop*/
void loop()
{
lastButtonState=buttonState;
buttonState=digitalRead(pirPin);
lastButtonState2=buttonState2;
buttonState2=digitalRead(pirPin2);
// if (recentPedestrian == false){
if (lastButtonState == HIGH){
if (buttonState == LOW) {
// pedestrian=true;
startTime = millis();
recentPedestrian = true;
}}
if (recentPedestrian == false){
if (buttonState == HIGH) {
// pedestrian=false;
}}
if (lastButtonState2 == HIGH){
if (buttonState2 == LOW) {
bike=true;
}}
if (buttonState2 == HIGH) {
bike=false;
}
/*
Serial.print(“millis() = “);
Serial.print(millis());
Serial.print(” startTime = “);
Serial.print(startTime);
// Serial.print(” pedestrian = “);
// Serial.print(pedestrian);
Serial.print(” bike = “);
Serial.print(bike);
Serial.print(” recentPedestrian = “);
Serial.println(recentPedestrian);
*/
if (recentPedestrian==true) {
if (bike==true) {
uint8_t result = MP3player.playTrack(random(1,6));
delay(3000);
if (result == 0) // playTrack() returns 0 on success
{
// Success
}
else // Otherwise there’s an error, check the code
{
// Print error code somehow, someway
}}}
currentMillis=millis();
if(currentMillis – startTime >= interval) {
recentPedestrian = false;
}}
void initSD()
{
//Initialize the SdCard.
if(!sd.begin(SD_SEL, SPI_HALF_SPEED))
sd.initErrorHalt();
if(!sd.chdir(“/”))
sd.errorHalt(“sd.chdir”);
}
void initMP3Player()
{
uint8_t result = MP3player.begin();
if(result != 0) // check result, see readme for error codes.
{
// Error checking can go here!
}
MP3player.setVolume(volume, volume);
MP3player.setMonoMode(monoMode);
}