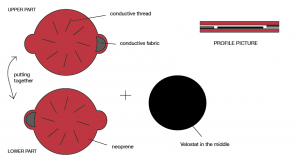
Pressure sensor is made like a bend sensor with a conductive thread, velostat, conductive fabric and non-conductive material.
Structure of pressure sensor
(click for bigger picture)
Parts of the sensor:
- Conductive thread : to connect threads in the circuit
- Non-conductive material (neoprene) : to give the sensor structure
- Velostat : a piezo resistive material
- Conductive fabric : to connect sensor with Arduino and other components
How to make a bend sensor
CONTROLLING SERVO MOTOR AND LED WITH TEXTILE PRESSURE SENSOR
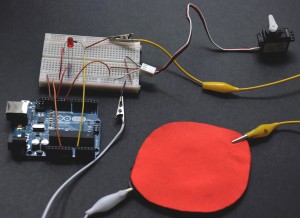
Textile pressure sensor is connected to A0, servo motor on pin 9 and LED on pin 12.
I connect an analog resistive sensor (custom made textile pressure sensor) with a fix resistor to create a voltage divider. Servo motor in this case works better with 4,7k Ohm fixed resistor than higher resistors.
Sensor is measuring resistance. When the pressure on the sensor is high, resistance is lower, so electrical potential in the circuit is higher ( U = R x I ).
LED goes off when pressure reaches maximum and servo motor 179 degrees (or 0 degrees on Serial Monitor, depending on how you are looking at). I used a servo motor as a pointer to show different values on the scale. It is changing depend on weight/pressure on the textile sensor.
Sensor can works as a scale (to measure change in a weight), as a push button (to start an action) or as a bend/flex sensor (to measure change in resistance with an angle of the sensor).
Code:
#include <Servo.h>
Servo pointer;
int sensorPin = 0;
int Val;
int Angle;
int LedPin = 12;
void setup(){
pointer.attach(9);
pinMode (12, OUTPUT);
Serial.begin(9600);
}
void loop(){
Val = analogRead(sensorPin);
Serial.print(“sensorValue: “);
Serial.print(Val);
Serial.print(” angle: “);
Serial.println(Angle);
Angle = map(Val, 316, 1023, 0, 179);
Angle = constrain (Angle, 0, 179);
digitalWrite(12,Angle);
if (Angle > 100 ){
LedPin == HIGH;
}
else
LedPin == LOW;
pointer.write(Angle);
delay(15);
}

